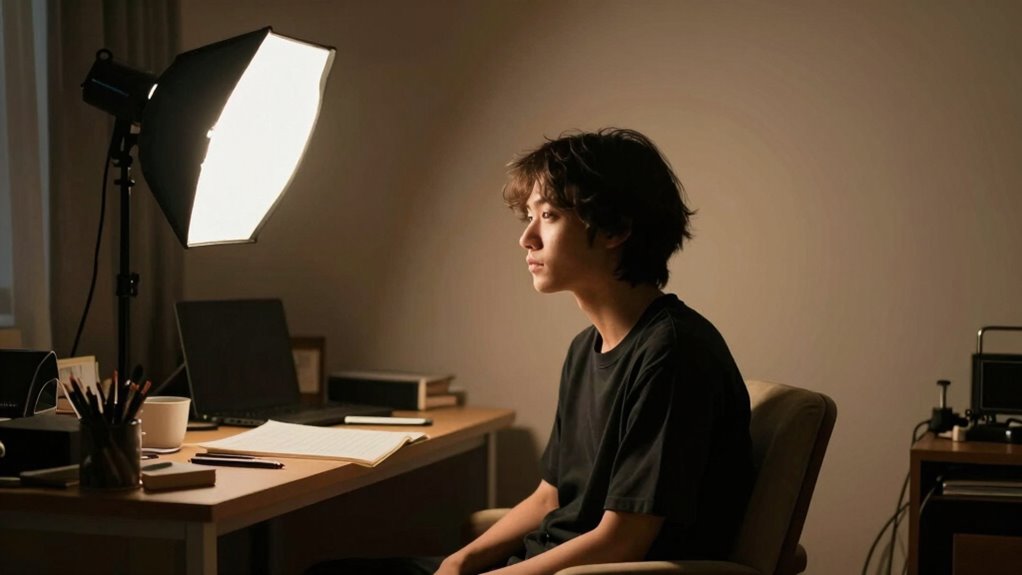
To make your home videos look professional in a small room, use three-point lighting with compact, adjustable lights. Position your key light slightly above and at a 45-degree angle to your face for soft shadows. Add a fill light with lower brightness to reduce harsh shadows, and place a backlight behind or above to add depth. Proper angles and diffuser adjustments will help you control spill and overexposure—continue to explore for detailed setup tips.
Key Takeaways
- Position the key light at a 45-degree angle slightly above eye level to create soft, flattering shadows.
- Use diffusers or softboxes on all lights to soften shadows and prevent harsh contrasts in small spaces.
- Place the fill light lower in brightness opposite the key to balance shadows and maintain a natural look.
- Position backlights behind and above the subject, directed downward to add depth without overexposing the scene.
- Control light spill with barn doors, flags, or reflectors to keep the background dark and distraction-free.

ALTSON 60 LED Portable Selfie Light Video Conference Lighting with Clip & Camera Tripod Adapter Rechargeable 2200mAh CRI 97+, 3 Light Modes for Phone iPhone Webcam Laptop Photo Makeup
【Best Light Effect CRI 97+】This slim and lightweight LED light will brighten up your beauty in front of…
As an affiliate, we earn on qualifying purchases.
As an affiliate, we earn on qualifying purchases.
Why Is Three-Point Lighting Effective in Small Rooms?
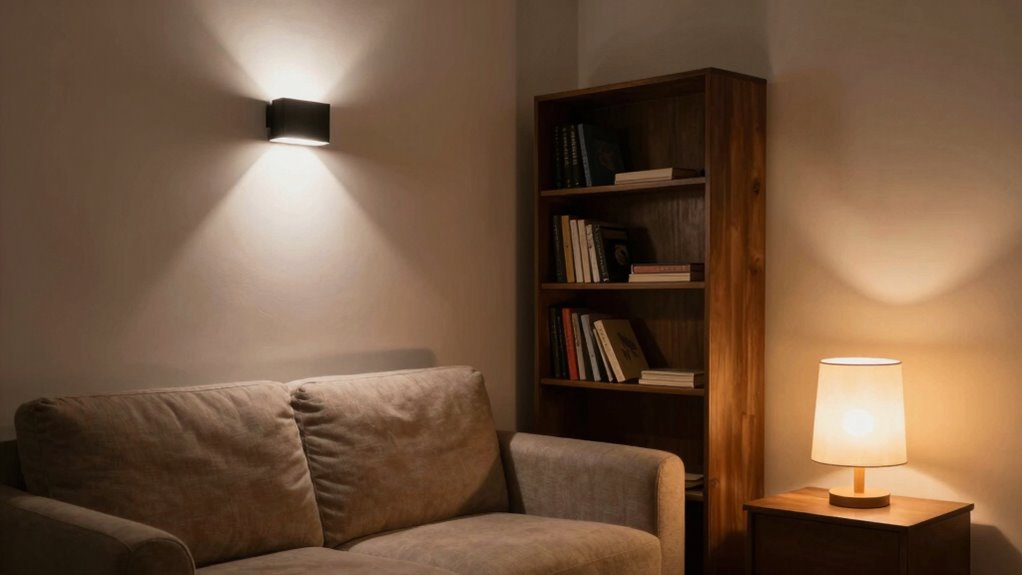
Have you ever wondered why three-point lighting works so well in small rooms? It creates a balanced, professional look by controlling ambient light and reducing unwanted shadows. The key is the precise placement of the key, fill, and back lights, which manage how light interacts with the space. In small rooms, this setup prevents harsh contrasts and overly bright spots, making your subject pop naturally. Adjusting color temperature helps match the ambient light, whether you want a warm, cozy feel or a cooler, more neutral tone. This consistency helps your video appear polished and intentional. By carefully layering light sources, you can maximize the limited space, making it feel larger and more inviting, all while emphasizing your subject with clarity. Additionally, understanding lighting placement techniques can further enhance the overall effect in confined areas, especially when considering light diffusion to soften shadows and create a more flattering look. Properly managing light intensity ensures your scene remains balanced without overwhelming the small space. Recognizing light control methods can help you fine-tune your setup for optimal results in tight environments, and using natural light creatively can also boost the overall ambiance.
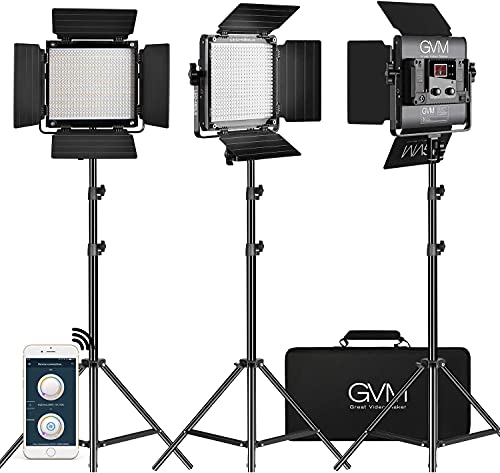
GVM 3 Pack LED Video Lighting Kits with APP Control, Bi-Color Variable 2300K~6800K with Digital Display Brightness of 10~100% for Video Photography, CRI97+ TLCI97 Led Video Light Panel +Barndoor
Led video lighting kit with app control: 2019 upgrade video lighting kit, app control model, Color temperature from…
As an affiliate, we earn on qualifying purchases.
As an affiliate, we earn on qualifying purchases.
How Do You Choose Compact Lights for Small Rooms?
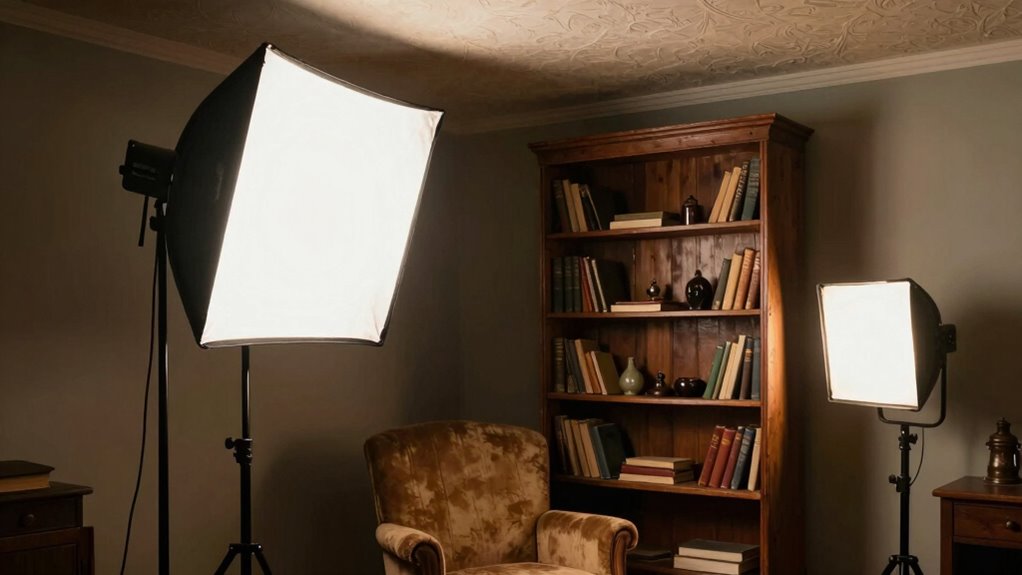
Choosing the right compact lights for small rooms involves balancing size, power, and versatility. You want lights that fit comfortably without sacrificing quality. Look for options that offer diffused lighting to create soft, even illumination, reducing harsh shadows. Consider the color temperature; adjustable lights let you set warm or cool tones to match your scene’s mood. Small LED panels with adjustable brightness are ideal because they’re lightweight and easy to position. Additionally, select lights with versatile mounting options, so you can place them precisely where needed. Keep in mind that a compact size doesn’t mean sacrificing control—look for features like dimming and adjustable angles to fine-tune your setup for *best* three-point lighting. Incorporating AI-driven lighting controls can further optimize your setup by automatically adjusting brightness and color for consistent results. Moreover, choosing lights with compact design ensures easier storage and transport, especially for mobile or limited-space setups. To maximize efficiency, consider integrating light modifiers such as diffusers or reflectors to shape and soften the light further. Using high-quality components can also improve durability and overall performance of your lighting setup. Additionally, selecting lights with high color rendering index (CRI) helps achieve more accurate and natural color reproduction in your scenes.

Torjim Softbox Photography Lighting Kit, 16'' x 16'' Professional Softbox Lighting Kit with 85W 3000-7500K LED Bulbs, Studio Lights for Photography/Video Recording/Live Streaming/Portraits Shooting
【Illuminate Your Creativity】 Torjim softbox lighting kit is made of high-quality PET fabric and a foldable nylon cover,…
As an affiliate, we earn on qualifying purchases.
As an affiliate, we earn on qualifying purchases.
How to Set Up Your Key Light in a Small Space?

To set up your key light in a small space, start by carefully positioning it to illuminate your face evenly without creating harsh shadows. Keep an eye on light spill and adjust your light’s angle or use modifiers like barn doors or flags to control it. This way, you’ll get professional-looking results without overwhelming your limited room. Additionally, consider using household organization tips to enhance the overall look and durability of your lighting setup. Proper space management can help optimize your setup and prevent clutter from interfering with your shot. Remember that the horsepower of electric dirt bikes can be quite high, so ensuring your space is safe and free of obstacles is crucial for a smooth filming experience. Incorporating techniques from auditory processing therapy can also help refine your lighting adjustments by improving your visual focus and attention in a cluttered environment.
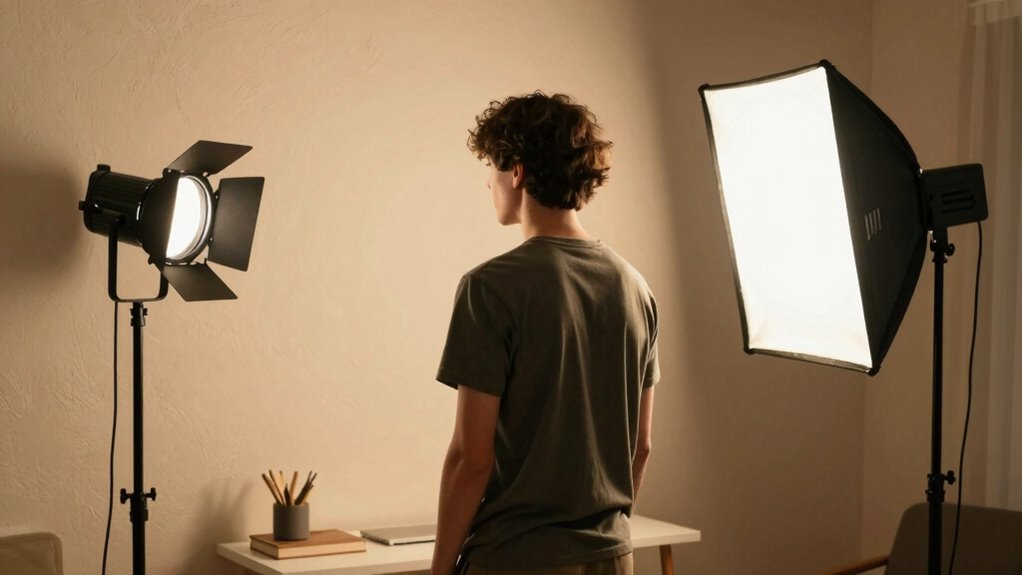
Positioning Your Key Light
In a small space, positioning your key light effectively is essential to achieving a professional look without overcrowding. You want the light to highlight your face naturally, avoiding harsh shadows or overexposure. Place your key light at a 45-degree angle from your camera and slightly above eye level to create flattering, soft shadows. Use light diffusion to soften the light and prevent glare. Consider adjusting the color temperature to match your environment, ensuring skin tones look natural. Proper placement helps maximize space and control spill, making your setup look polished. Additionally, paying attention to light diffusion techniques can significantly improve the overall quality of your video lighting. Using light modifiers can further enhance the softness and control of your lighting setup. Keep these factors in mind for ideal results:
- Position the light about 2-3 feet from your face
- Use light diffusion materials like softboxes or bounce cards
- Match the color temperature to your room’s ambient light
- Controlling light spill is especially important in small rooms to avoid unnecessary glare and reflections. Incorporating light placement strategies can help optimize your setup in confined spaces.
Controlling Light Spill
Ever wonder how to keep your small space from turning into a glare-filled mess? Light spill can quickly ruin your shot, but good light control makes a difference. To manage this, position your key light carefully, aiming it directly at your subject without letting it spread beyond. Use barn doors, flags, or even pieces of cardboard to block unwanted light from hitting walls or ceilings. Softboxes and diffusers also help contain light spill, creating a controlled beam that focuses on your subject. Adjust your light’s angle and distance to minimize glare and reflections. Remember, controlling light spill isn’t just about brightness; it’s about shaping your light to keep the background dark and distraction-free. Proper light control ensures a clean, professional look even in a small space. Additionally, understanding your LiFePO4 battery specs, such as appropriate charger settings and low-voltage cutoff, can help ensure your lighting equipment remains powered reliably during shoots. Using light modifiers can further enhance your control by shaping and directing the light precisely where you need it.

EMART 60 LED Continuous Portable Photography Lighting Kit for Table Top Photo Camera Video Recording Studio Light Lamp with Adjustable Tripod Stand & Color Filters – 2 Packs
Adjustable LED Panel Kit: 60 LEDs / 1400 Lumens / 180° Adjustable Angle / Mini-Tripod Maximum Height 11…
As an affiliate, we earn on qualifying purchases.
As an affiliate, we earn on qualifying purchases.
How Can You Add Fill Light to Soften Shadows?
Adding fill light is essential for softening harsh shadows and achieving a balanced look in your home videos. It helps create diffused illumination that reduces shadow severity and adds shadow softness, making your subject appear more natural. To do this effectively, consider these options:
Fill light softens shadows and creates a natural, balanced look in your home videos.
- Use a softbox or umbrella to spread light evenly and avoid harsh edges.
- Place a reflector opposite your main light to bounce light back onto your subject.
- Use LED panels with diffusers to achieve consistent, gentle illumination without creating hotspots.
- Incorporate techniques from professional water park lighting setups to ensure even coverage and eliminate unwanted shadows. Implementing proper light diffusion techniques helps prevent harsh glare and creates a more flattering look.
- These techniques help eliminate stark shadows, giving your video a more professional and polished appearance. Additionally, adjusting the lighting ratio between your key and fill lights can further enhance shadow control and overall image quality.
- By controlling the quality and placement of your fill light, you guarantee your subject is well-lit and visually appealing, even in small, confined spaces.
Where Should You Place the Backlight in a Small Room?
To get the best results, place your backlight slightly behind and above your subject, aiming to create separation from the background. Make sure it’s not too close, or you risk overexposure and harsh shadows. Finding the right position helps highlight your subject without washing out details or causing unwanted shadows.
Ideal Backlight Position
In a small room, placing the backlight correctly can make a significant difference in your video’s overall quality. The ideal position is behind and slightly above your subject, aimed downward at a shallow angle. This placement helps reduce ambient shadows on the face while creating a pleasing separation from the background. Positioning the backlight too close can cause harsh, unflattering shadows, so aim for a soft diffusion to spread the light evenly. Keep in mind that the goal is to highlight the subject without overwhelming the scene. Using a light diffuser or bouncing the light off a surface ensures gentle illumination. Proper placement balances ambient shadows and light diffusion, giving your shot a professional, polished look.
Avoiding Overexposure Shadows
Placing the backlight correctly is essential to prevent overexposure shadows that can ruin your video. To achieve this, position your light so it’s slightly above and behind the subject, directed downward, to avoid harsh shadows. Use diffuse materials like softboxes or bounce surfaces to soften the light, reducing overexposure and creating a more natural look. Adjust the backlight’s color temperature to match your key and fill lights, preventing unnatural color casts and ensuring consistent lighting. Keep the intensity moderate to avoid overpowering the scene, which can cause overexposure on the subject’s hair or shoulders. Proper placement and diffusion help balance the light, minimize unwanted shadows, and produce a clean, professional appearance in your small room setup.
How Do You Adjust Light Angles and Brightness for a Natural Look?

Achieving a natural look with your home video lighting often depends on how you adjust the angles and brightness of your lights. Properly positioning your lights helps create natural color and subtle shadows that mimic real-life lighting. To do this effectively, consider these tips:
- Angle your key light slightly above eye level and direct it at your face for soft, even illumination.
- Use fill lights at lower brightness to reduce harsh shadows without flattening your features.
- Adjust brightness levels gradually, ensuring the light isn’t too harsh or too dim, maintaining a balanced, natural appearance.
What Are Common Challenges When Lighting Small Rooms?
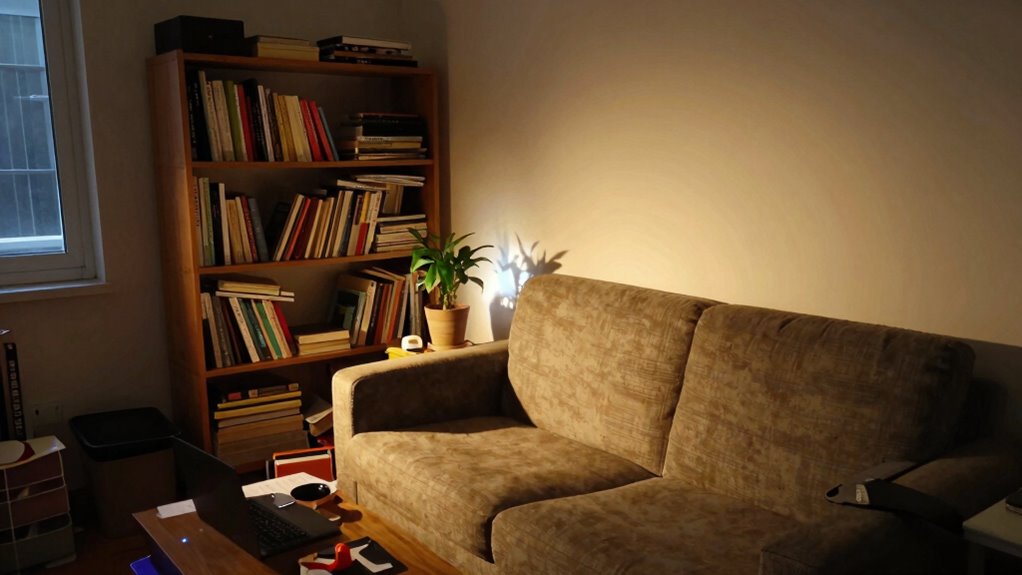
Lighting small rooms presents unique challenges because limited space makes it harder to evenly distribute light without creating harsh shadows or overexposure. You need to carefully consider room acoustics, as loud or echoing sounds can distract from your visuals, requiring softer lighting or sound treatment. Furniture placement also impacts your lighting setup; bulky furniture can block light or cast unwanted shadows, forcing you to reposition lights or choose smaller fixtures. Achieving a balanced look is tricky because space constraints limit your options for spreading out lighting equipment. You must be strategic, often combining multiple light sources and adjusting angles to avoid hotspots or dark corners. Ultimately, understanding these challenges helps you optimize your small-room setup for professional-quality video.
How Can You Record Professional Home Videos With Limited Equipment?

Wondering how to make your home videos look professional without expensive gear? You can achieve great results by focusing on key lighting principles. Use natural light when possible, positioning yourself near windows for soft, diffused light. If you need to supplement, use lamps with adjustable color temperature to match your environment, avoiding harsh shadows. Light diffusion is essential—place a sheer curtain or white cloth over your light source to soften shadows and create a more flattering look.
- Position lights at different angles to mimic three-point lighting, even with limited equipment
- Adjust the color temperature of your lights for natural, consistent skin tones
- Use light diffusion techniques to reduce harsh shadows and create a smooth, professional appearance
Frequently Asked Questions
How Can I Prevent Glare and Reflections in a Small Room?
To prevent glare and reflections in a small room, you should focus on glare reduction and reflection control. Use matte or non-reflective surfaces for walls and furniture, and position your lights to avoid direct reflections into the camera. Adjust your lighting angles so they don’t hit shiny surfaces, and consider diffusing light sources with softboxes or diffusers. Keeping light soft and indirect helps create a clearer, glare-free video scene.
What Are the Best Color Temperatures for Home Video Lighting?
They say, “You are what you light,” so choose your color temperature wisely. For home videos, aim for 5000K to 6500K to create a natural, daylight-like light ambiance. This range offers a crisp, neutral tone that’s flattering and versatile. Avoid extremes like warm 2700K or cool 10000K, which can distort skin tones. By selecting the right color temperature, you’ll achieve bright, balanced lighting that enhances your videos.
How Do I Avoid Overexposing My Subject With Small Lights?
To avoid overexposing your subject, use diffusion techniques to soften the light and reduce harshness. Keep your small lights at a proper distance—closer can intensify brightness, so back them up slightly. Adjust the intensity or dimmers if available, and monitor your camera’s exposure settings. Testing different setups helps find the right balance, ensuring your subject isn’t overexposed while maintaining a natural look.
Can Natural Light Be Integrated Into Three-Point Lighting Setups?
Natural light is like a gentle river flowing into your scene, seamlessly blending with your three-point lighting setup. You can definitely integrate natural light to enhance your shot by positioning your subject near windows or opening curtains during filming. Use lighting integration techniques by balancing the sunlight with your artificial lights, adjusting your camera settings, and diffusing sunlight if needed, creating a more natural, harmonious look in your video.
How Do I Maintain Consistent Lighting Throughout Different Times of Day?
You can maintain consistent lighting throughout the day by adjusting your lights with color temperature controls, ensuring they match natural light changes. Use light diffusion techniques like softboxes or diffusion gels to create even, gentle illumination that minimizes shadows and fluctuations. Regularly monitor your scene and make small tweaks to your setup, keeping the color temperature steady and diffusing light evenly for a uniform look regardless of the time.
Conclusion
Think of your small room as a tiny stage—every light is a cast member shaping the scene. When you master three-point lighting, you’re directing your own professional production, even with limited space. Just like a skilled filmmaker, you can turn a cramped corner into a cinematic setting. With patience and experimentation, you’ll find that even the smallest space can shine, proving that great lighting isn’t about size but about how you use it.