To fix lumpy or flat milk foam in three minutes, start by using fresh, cold milk and guarantee your steam wand is properly submerged just below the surface. Maintain steady, gentle movement while frothing and avoid overheating the milk beyond 150°F. If bubbles are uneven, tap the pitcher and re-froth. Paying attention to these common mistakes helps you achieve smooth, glossy microfoam every time—stay tuned to discover more expert tips for perfect frothing.
Key Takeaways
- Use fresh, cold milk and submerge the steam wand just below the surface to incorporate air effectively.
- Maintain steady, gentle motion during frothing to prevent lumps and achieve microfoam.
- Turn off the steam before the milk overflows, then tap and swirl the pitcher to remove bubbles and smooth the foam.
- Check and adjust milk temperature to stay within 140°F to 150°F for ideal frothing conditions.
- Regularly clean and inspect your steam wand and frothing pitcher for consistent, high-quality foam.
What Does Perfect Milk Froth Look Like?
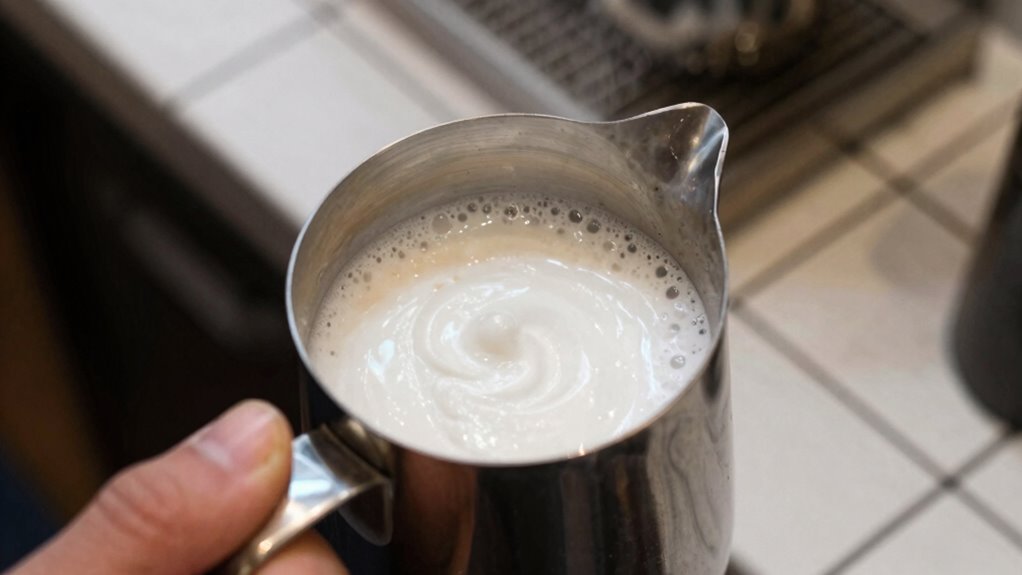
A perfect milk froth should have a smooth, velvety texture with a glossy appearance. When you pour it into your espresso, it should flow smoothly and create intricate latte art designs. Achieving this starts with the right milk temperature—aim for around 140°F to 150°F. Too hot, and the milk loses its silky consistency; too cold, and it won’t froth properly. The froth should be fine and microfoam-like, with tiny bubbles that give it that glossy shine. When you tilt the pitcher, the foam should move fluidly, holding its shape without collapsing or becoming lumpy. This ideal froth is the foundation for beautiful latte art and a rich, satisfying coffee experience. Additionally, using the correct steaming technique helps ensure your foam achieves the perfect texture and stability. Properly texturing milk also involves positioning the steam wand correctly and controlling airflow for consistent results. To optimize your milk frothing process, incorporating the right tools and techniques can make all the difference in achieving professional-quality foam. For optimal results, temperature control during steaming is essential to prevent overheating and preserve the milk’s integrity, which directly impacts the consistency of the froth.
Common Mistakes That Cause Lumpy or Flat Froth (And How to Spot Them)
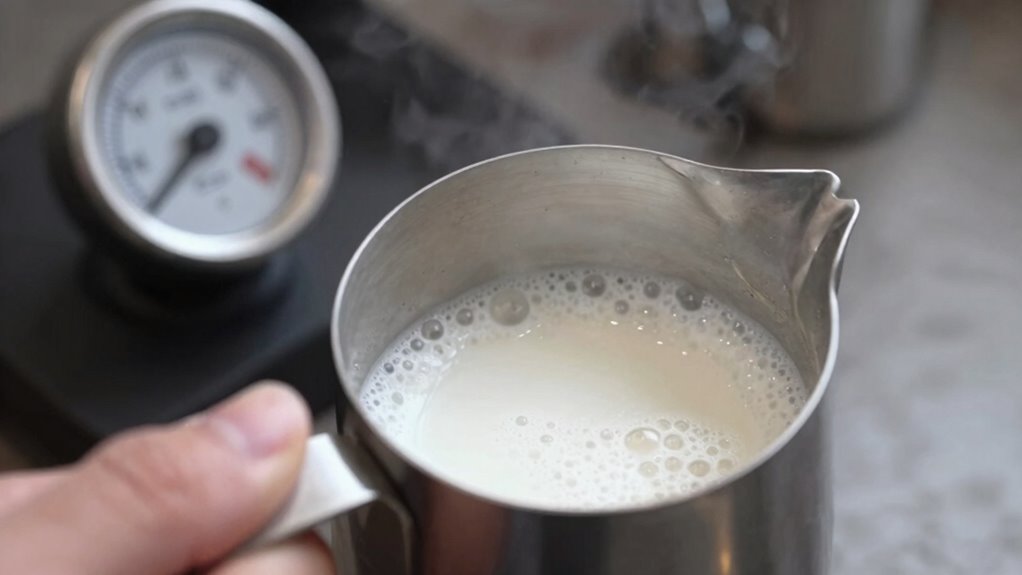
Even when you aim for perfect milk froth, mistakes can lead to lumps or a flat, lifeless foam. One common issue is using milk that’s too hot or too cold, which affects milk temperature and prevents proper aeration. If the milk isn’t heated to the right range (around 140-155°F), the foam may turn out flat or clumpy. Additionally, using the wrong frothing tools can cause problems. For example, a poorly functioning steam wand or an inadequate frothing pitcher can hinder the formation of smooth, consistent foam. Keep an eye out for uneven or lumpy textures, which often indicate improper technique or incorrect milk temperature. Recognizing these signs helps you troubleshoot and avoid these mistakes in future frothing attempts. proper steaming techniques can also help you achieve a creamier, more stable foam. Understanding the science of milk frothing and how body composition impacts foam stability can further improve your results and help you get the perfect foam every time, especially when you understand the role of temperature and aeration in the process.
Quick Fixes for Smooth, Creamy Milk Foam in Under 3 Minutes
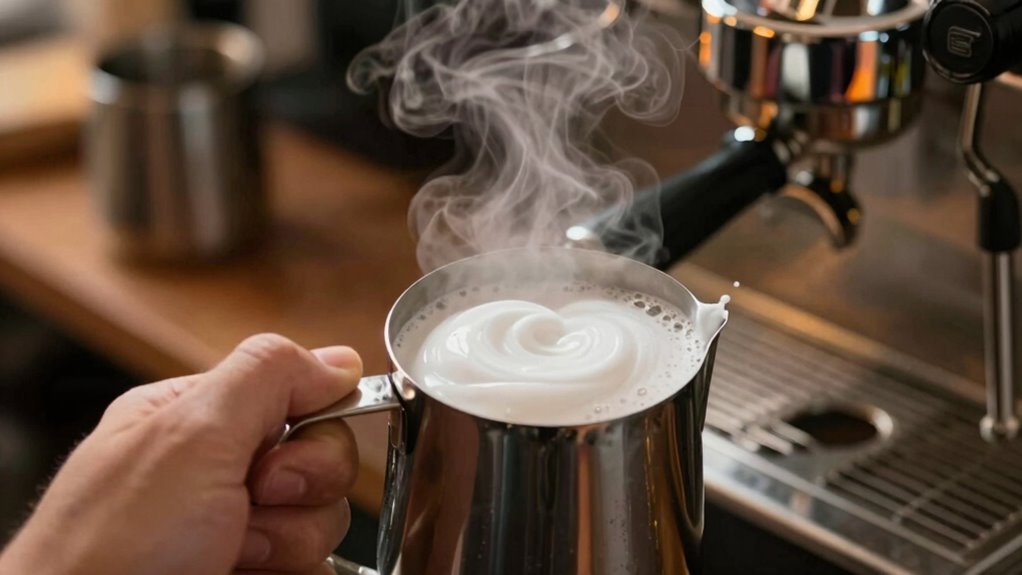
To achieve smooth, creamy milk foam quickly, focus on proper technique and timing. Start by ensuring your equipment is clean and well-maintained, as brewing techniques depend on a spotless steam wand or frothing pitcher. Follow these quick fixes:
- Use fresh, cold milk – it froths better and creates creamier foam.
- Submerge the steam wand just below the milk surface to incorporate air efficiently.
- Keep a steady, gentle motion; avoid over- or under-mixing.
- If foam is flat or lumpy, briefly turn off the steam, tap the pitcher to release bubbles, then re-froth for a few seconds.
- Regularly inspecting and maintaining your equipment ensures consistent, high-quality foam results.
- Understanding the science of milk frothing can help you troubleshoot and improve your technique faster. For example, the thermal properties of milk influence how it froths, making temperature control crucial.
- Practicing proper frothed milk texture helps develop a more intuitive feel for achieving the perfect foam.
- Familiarizing yourself with the ideal temperature range for milk can prevent overheating and ensure optimal frothing results.
These steps optimize brewing techniques and equipment maintenance, helping you fix foam instantly and enjoy perfect milk every time.
Frequently Asked Questions
Can Using Different Milk Types Affect Frothing Quality?
Yes, using different milk types affects frothing quality because milk composition varies. For instance, whole milk creates creamier foam due to higher fat content, while skim milk froths more easily but produces lighter foam. Lactose effects also matter; some lactose-free milks may not foam as well. Experimenting with various milks helps you find the ideal match for your desired foam texture and flavor.
What’s the Ideal Temperature for Frothing Milk?
Think of milk temperature as the Goldilocks zone—just right. You should aim for around 150°F (65°C) to achieve perfect frothing consistency. Too hot, and the milk turns bitter; too cold, and it won’t foam well. Use a thermometer to monitor, and you’ll get smooth, velvety foam every time. Staying within this temperature range guarantees your milk froths beautifully and enhances your coffee experience.
How Does the Frothing Technique Vary Between Espresso Machines?
You’ll notice that frothing technique varies between espresso machines because of differences in steam wand design and power. With some machines, you need to adjust your frothing speed to create the ideal milk texture, ensuring smooth, glossy foam. Others require a gentler or faster approach. To fix your foam quickly, focus on maintaining consistent steam pressure and controlling your frothing speed, regardless of your machine’s specifics.
Is It Better to Froth Milk Before or After Brewing Coffee?
It’s better to froth milk before brewing coffee because fresh, properly stored milk creates better foam. Keep your milk stored cold and use good frothing accessories for smoother, creamier results. Frothing first guarantees you have hot, frothy milk ready to add to your espresso or coffee. This way, the milk stays warm longer and maintains its texture, giving you a richer, more satisfying drink.
How Do I Clean My Frother to Maintain Optimal Performance?
A stitch in time saves nine, so you should clean your frother regularly to keep it working well. To maintain peak performance and prevent milk contamination, disassemble the frother and wash all parts with warm, soapy water after each use. For deeper cleaning, run a vinegar or lemon solution through it periodically. This keeps your frother’s lifespan long, ensuring consistent, perfect foam every time.
Conclusion
Now that you know how to spot and fix common milk frothing mistakes, you’re well on your way to barista-quality foam. Remember, practice makes perfect, and even pros hit a rough patch now and then. Don’t throw in the towel if things don’t go perfectly at first—sometimes, it’s just a matter of fine-tuning your technique. Keep at it, and before you know it, you’ll be turning out smooth, creamy froth like a pro every single time.