
When your 13×19 prints look off or dull, the paper choice often plays a big role. Using the wrong paper type, weight, or finish can cause colors to fade, details to blur, or glare to increase. Factors like brightness, coating, and texture considerably affect how vibrant and sharp your prints appear. To get better results, you need to match your paper with your printing technique and equipment. Keep exploring for more tips to improve your wide-format prints.
Key Takeaways
- Choosing the wrong paper type or finish can cause dull colors, reduced sharpness, and undesirable glare in 13×19 prints.
- Inconsistent paper weight, coating, or surface texture affects ink absorption and overall print vibrancy.
- Improper printer settings and poor paper handling lead to color inaccuracies, streaks, or uneven ink distribution.
- Using incompatible inks or not calibrating monitors and printers can result in prints looking off or miscolored.
- Storing papers improperly or using low-quality materials diminishes print durability and visual quality over time.

A-SUB Premium Photo Paper High Glossy 13×19 Inch 66lb for Inkjet Printers 50 Sheets, Single Sided
Broad color gamut, outstanding color gradation performance for the true color reproduction of the image
As an affiliate, we earn on qualifying purchases.
As an affiliate, we earn on qualifying purchases.
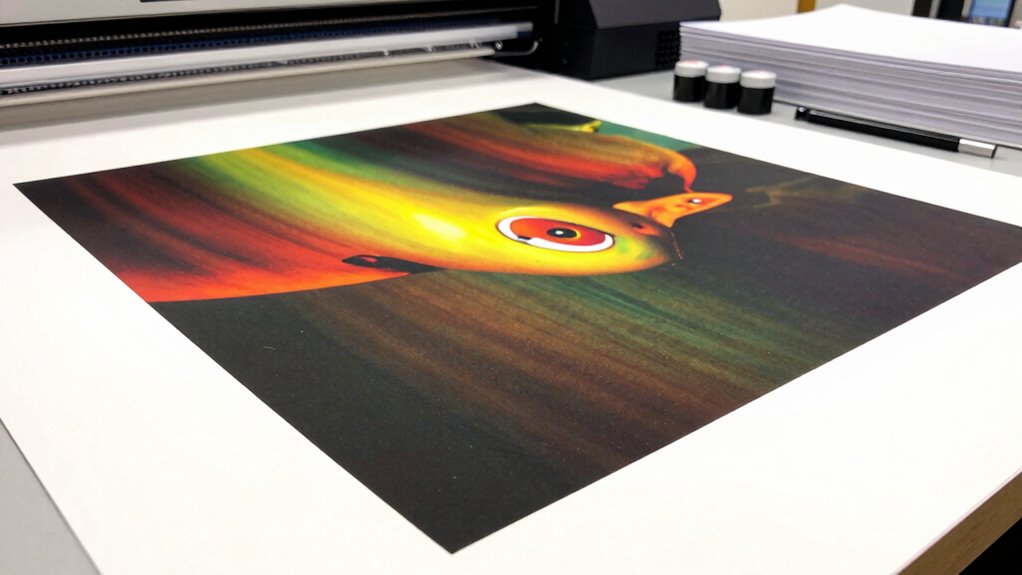
Why Do My 13×19 Prints Look Off or Dull? Common Issues and Fixes

If your 13×19 prints look dull or off-color, it’s often due to common printing issues that can be easily fixed. One key factor is paper weight; using paper that’s too light or inconsistent can cause uneven absorption, resulting in muted images. Additionally, ink compatibility plays an essential role—if your ink isn’t suited for the paper type, colors may appear faded or inaccurate. Ensure you select the right paper weight for your printer and project, and verify that your ink is compatible with the paper you’re using. Proper matching of paper and ink helps achieve vibrant, true-to-life colors and sharper images. Furthermore, inverter generators can provide a stable power source for high-quality printing setups, reducing the risk of power fluctuations affecting your print quality. Understanding paper types and their properties is crucial for optimal results. Also, being aware of printing techniques can help troubleshoot and improve print quality significantly. Considering color management practices ensures consistent color reproduction across devices and outputs. Addressing these issues can markedly improve your print quality without much hassle.

Epson Premium Presentation Paper MATTE (8.5×11 Inches, Double-sided, 50 Sheets) (S041568),Bright White
Perfect for non-glare photographs, craft projects and signage.
As an affiliate, we earn on qualifying purchases.
As an affiliate, we earn on qualifying purchases.
Understanding How Paper Choices Impact Color Vibrancy and Sharpness

Your paper choices directly affect how vibrant and sharp your prints look. Brightness and gloss can make colors pop, while coating and texture add depth and detail. Thicker, more opaque paper offers better contrast, but it also influences the overall clarity of your images. Additionally, selecting appropriate paper types can help optimize color vibrancy and image sharpness. Considering the paper finish is also crucial, as it can alter how light interacts with your print and affect perceived sharpness and color richness. Opting for the right surface treatment can further enhance the visual impact of your prints. Exploring different printing techniques can also maximize the quality and longevity of your wide-format prints.
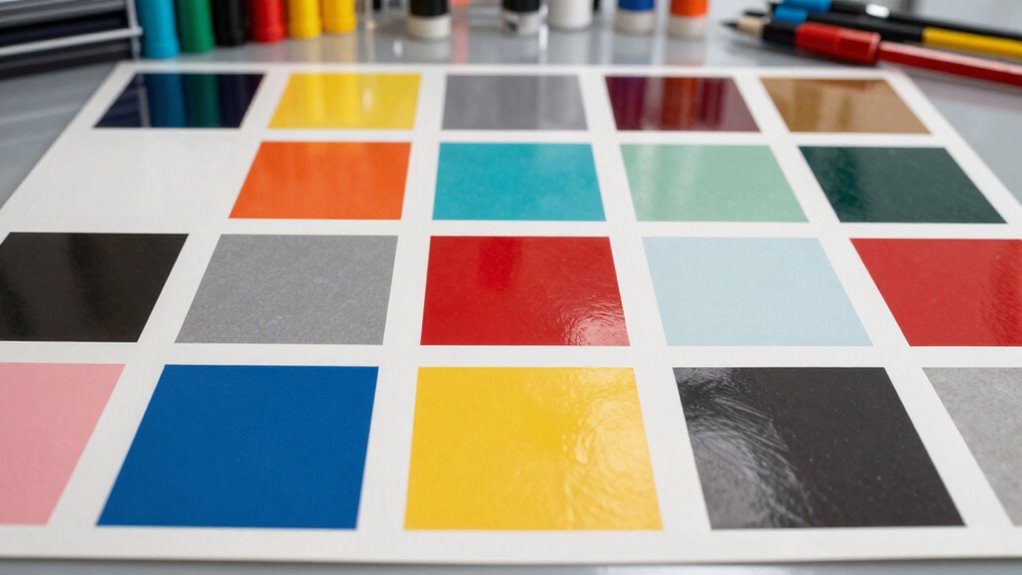
Paper Brightness and Gloss
Have you ever wondered how paper brightness and gloss influence the vibrancy and sharpness of your printed images? Higher paper brightness reflects more light, making colors pop and details stand out. Meanwhile, the gloss level affects how light interacts with the print—glossier papers enhance color depth but can produce glare, while matte finishes reduce glare but may mute vibrancy. To help you choose, consider this table:
| Paper Brightness | Gloss Level | Effect on Prints |
|---|---|---|
| High | High | Vibrant, sharp, glossy finish |
| High | Low (Matte) | Bright, muted sheen |
| Medium | High | Balanced vibrancy |
| Medium | Low (Matte) | Soft, subdued look |
| Low | Any | Dull, less vibrant |
Matching brightness and gloss helps achieve your desired visual impact.
Coating and Texture Effects
Paper coating and texture play significant roles in how your prints look and feel. A gelatin coating, for example, can enhance color vibrancy by providing a smooth, glossy surface that reflects light well, making images pop. Conversely, a textured surface introduces a tactile element that can add depth and visual interest but may slightly diffuse light, reducing sharpness. The coating influences how ink adheres and dries, affecting sharpness and detail clarity. A glossy coating amplifies color intensity and contrast, while matte or textured finishes soften colors and reduce glare. Choosing the right coating and texture ensures your prints achieve the desired vibrancy and sharpness, making your wide-format prints more impactful and visually appealing. Additionally, selecting paper with appropriate surface properties can help minimize issues like color shifting or unintended glossiness caused by environmental factors.
Paper Thickness and Opacity
Ever wondered how paper thickness and opacity influence the final look of your wide-format prints? Thicker paper, with higher paper weight, often produces sharper images and better color vibrancy because it absorbs ink more evenly. Opacity levels determine how much light passes through, affecting sharpness and preventing show-through. Higher opacity means less transparency, resulting in clearer details and more vibrant colors. Conversely, thinner paper can cause ghosting or dull colors. Use the right balance: a heavier, opaque paper enhances sharpness and color richness, while lighter, more transparent options might suit backgrounds or less detailed projects.
| Paper Weight | Opacity Level | Best Use Case |
|---|---|---|
| Light (60-80 lb) | Low | Drafts, backgrounds |
| Medium (90-110 lb) | Medium | Photographs, artwork |
| Heavy (120+ lb) | High | Fine art prints, professional displays |

13×19 Matte Photo Paper, Goefun 200 GSM/54 LB Inkjet Photo Paper for Printer 100 Sheets for Posters and Art Prints
Photo Paper Matte: Get 100 sheets of 13×19 photo paper in 1 pack, 200GSM/54LB, each measuring 9 mil…
As an affiliate, we earn on qualifying purchases.
As an affiliate, we earn on qualifying purchases.
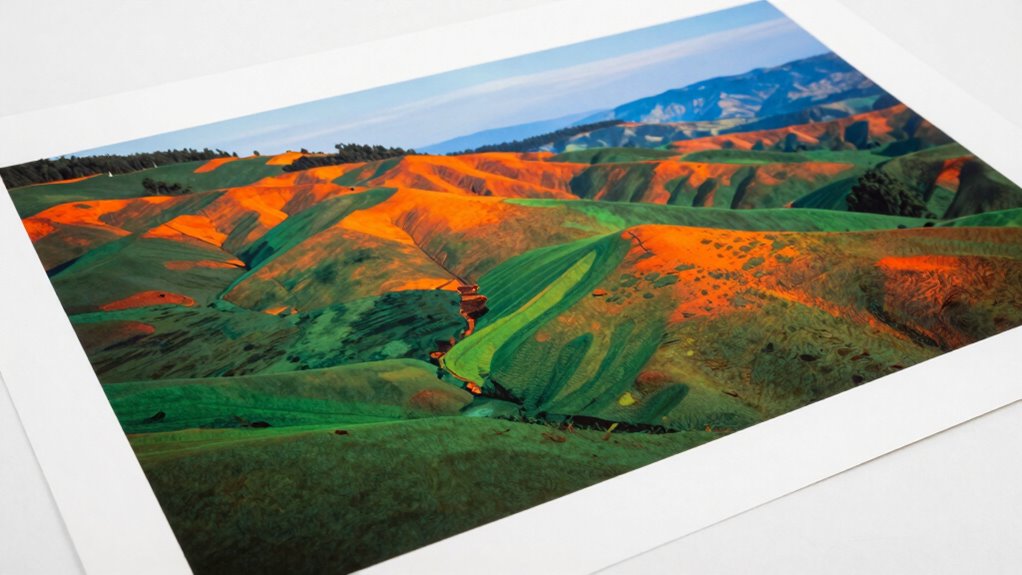
The Best Paper Types for 13×19 Prints: Pros and Cons

Choosing the right paper type affects both texture and finish, influencing how your print looks and feels. You’ll want to ponder how ink absorption impacts brightness and detail, as different papers handle ink differently. Understanding these factors helps you pick the best paper for your specific printing needs.
Paper Texture and Finish
Have you ever wondered how the texture and finish of your 13×19 print can influence its overall impact? Textured surfaces add depth and tactile interest, making your images feel more dynamic and engaging. They can enhance artistic or fine art prints by emphasizing brushstrokes or surface details. Matte finishes, on the other hand, reduce glare and reflections, providing a soft, subdued look that’s ideal for viewing in bright environments. They also help hide fingerprints and smudges, keeping your print looking clean longer. Additionally, choosing the right paper texture can improve your Indigenous cultural appreciation experience by providing a more authentic and respectful presentation of Indigenous art and skills. Understanding print surface characteristics can help you select the most suitable paper for your project. Recognizing how different surfaces affect color reproduction is also crucial for achieving the desired visual outcome. However, textured surfaces can sometimes diminish sharpness, and matte finishes might mute colors slightly. Choosing the right paper texture and finish depends on the mood and purpose of your print, so consider how these elements will complement your image’s style.
Ink Absorption and Brightness
The texture and finish of your paper influence not only how your print looks but also how the ink interacts with the surface. Ink absorption plays a crucial role; papers that absorb ink too quickly can lead to dull results, while those that absorb too little may cause smudging or uneven areas. Brightness affects how vivid your colors appear—higher brightness levels make images pop and enhance contrast. Matte papers tend to absorb ink more, creating softer, muted tones, whereas glossy surfaces reflect more light, boosting brightness and color vibrancy. Choosing the right balance between ink absorption and brightness depends on your desired outcome. For sharp, lively prints, opt for paper with moderate absorption and high brightness. This ensures your images are crisp, colorful, and true to your vision.

13" X 19" Premium Matte Bright White Inkjet Double Sided Photo Paper – 50 Sheets
Printable on Both Sides, Works Great With All Major Inkjet Manufactures
As an affiliate, we earn on qualifying purchases.
As an affiliate, we earn on qualifying purchases.
How Coatings and Finishes Change the Look of Your 13×19 Prints

Coatings and finishes can dramatically alter the appearance of your 13×19 prints, adding depth, texture, and protection. Lamination effects, for example, can create a glossy or matte surface, influencing how vibrant or subdued your colors appear. Gloss finishes boost brightness and make details pop, giving your print a lively, eye-catching look. Matte finishes, on the other hand, reduce glare and add a soft, subdued feel, making images look more refined and less reflective. These coatings not only change the aesthetic but also enhance durability, protecting against scratches and fingerprints. Choosing between lamination effects like matte or gloss depends on your desired final look and the environment where your print will be displayed. Understanding these finishes helps you achieve the perfect presentation for your artwork or photography. Incorporating surface protection can also extend the lifespan of your prints while maintaining their visual appeal.
Choosing the Right Paper for Your Photography or Artwork Style

Selecting the right paper is essential to showcase your photography or artwork in the best light. Your choice impacts color calibration, texture, and overall presentation. If you’re aiming for vibrant, true-to-life colors, opt for glossy or semi-gloss papers that enhance contrast. For a fine art look, consider matte or luster finishes that reduce glare and highlight subtle details. When planning gallery framing, choose paper that complements your frame style and enhances durability. Think about the surface texture—smooth papers suit modern, sharp images, while textured papers add depth to artistic work. Also, consider archival qualities to guarantee longevity. Paying attention to paper weight and texture can significantly influence the final appearance and durability of your prints. Understanding professional-grade printing equipment options can help you achieve consistent, high-quality results. Additionally, understanding color calibration techniques ensures your prints match your original vision. For optimal results, selecting papers with archival quality can provide better longevity and resistance to fading. As technology advances, staying informed about print longevity and preservation techniques can ensure your artwork remains vibrant for years to come. Keep these factors in mind to match your paper choice with your style, ensuring your prints look polished and professional every time.
How to Adjust Printer Settings and Handle Paper for Better Results
To achieve the best print quality, you need to carefully adjust your printer settings and handle your paper properly. Start by selecting the correct paper type in your printer menu, which guarantees appropriate ink formulation and drying times. Adjust the paper weight and quality settings to match your 13×19 paper, paying attention to its fiber content, which affects absorption and color accuracy. Always load the paper correctly, keeping it flat and aligned to prevent jams or misfeeds. Use the printer’s preview and calibration options to fine-tune color and contrast, ensuring inks sit evenly on the paper fiber. Avoid touching the printable surface with your fingers, as oils can interfere with ink adhesion. Proper handling and settings optimize ink formulation interaction, resulting in sharper, more vibrant prints. Additionally, understanding your paper’s fiber content can help you select the best printing parameters for consistent results. Being aware of the paper type ensures you choose the most compatible settings for your specific print job, leading to better overall quality. For optimal results, consider experimenting with printing profiles to find the perfect match for your paper and ink combination. Using proper paper storage can also prevent warping or moisture absorption that impacts print quality.
Comparing Costs and Durability of 13×19 Printing Papers
When comparing 13×19 printing papers, cost and durability stand out as key factors influencing your choice. Higher-quality papers often provide better paper longevity, meaning your prints will last longer without fading or yellowing. They also typically offer superior ink compatibility, ensuring vibrant colors and sharp details. However, premium papers tend to be more expensive, so balancing cost with durability is essential. Consider these points:
- Budget papers may fade faster but are cheaper upfront
- Archival papers offer the best paper longevity
- Coated papers improve ink compatibility for sharp images
- Uncoated papers are more affordable but less durable
- Specialty papers can enhance durability but increase costs
Ultimately, your choice depends on your print’s purpose and how long you want the image to last. Additionally, selecting papers with appropriate print safety features can help prevent issues such as smudging or color bleeding, ensuring your prints remain high quality over time.
Tips to Troubleshoot and Improve Your 13×19 Printing Quality

If your 13×19 prints aren’t meeting your expectations, troubleshooting your printer settings and workflow can make a significant difference. Start by ensuring proper color calibration; mismatched colors often cause prints to look off. Use calibration tools or software to match your monitor and printer profiles for consistent results. Also, check your paper storage—keep papers in a cool, dry place to prevent warping or moisture absorption, which can affect print quality. Verify that your printer’s settings align with the paper type and quality you’re using. Regularly clean print heads and nozzles to avoid streaks or uneven ink distribution. These small adjustments can dramatically improve color accuracy, print sharpness, and overall output, helping you achieve professional-looking 13×19 prints every time.
Maintaining Consistency in Wide-Format 13×19 Printing
Maintaining consistency in wide-format 13×19 printing requires a disciplined approach to your workflow and equipment. To guarantee reliable results, pay close attention to paper selection, storage, and handling. Consistently using high-quality, archival paper improves paper longevity and print durability. Regularly calibrate your printer to maintain color accuracy and prevent shifts. Keep your equipment clean to avoid dust or debris affecting print quality. Additionally, track your printing settings and paper batches to identify patterns that impact consistency. Consider these key points:
- Use the same brand and type of paper for uniformity
- Store paper in a controlled environment to preserve archival quality
- Calibrate your printer regularly for color accuracy
- Handle paper carefully to prevent damage or contamination
- Record settings and paper batches for future reference
These steps help ensure your prints remain consistent and long-lasting.
Frequently Asked Questions
How Do Different Ink Types Interact With Various 13X19 Paper Surfaces?
Different ink types interact with 13×19 paper surfaces through ink absorption and surface sheen. You’ll notice matte inks absorb better on uncoated paper, giving a softer look, while glossy inks sit on coated surfaces, enhancing shine and detail. Using dye-based inks on porous paper increases absorption, which can dull colors, whereas pigment inks stay vibrant on coated papers. Choosing the right ink for your paper surface guarantees better print quality and accurate color reproduction.
What Environmental Factors Affect the Longevity of 13X19 Prints?
Did you know that improper handling can reduce 13×19 print longevity by up to 50%? Humidity effects can cause paper warping or ink smudging, while UV exposure accelerates fading and deterioration over time. To safeguard your prints, keep them in a stable environment, away from direct sunlight and excessive moisture. Controlling these factors ensures your vibrant images stay sharp and vivid longer.
Can I Use Regular Photo Paper for Wide-Format 13X19 Printing?
You can use regular photo paper for wide-format 13×19 printing, but check its compatibility with your printer. Make sure it’s designed for large-format printing and matches your ink absorption needs. Not all photo papers are compatible, and some may cause color inaccuracies or poor ink absorption, resulting in less vibrant prints. For best results, choose photo paper specifically labeled for wide-format printers and your ink type.
How Does Paper Grain Direction Influence Print Quality and Durability?
You should pay attention to grain alignment because it affects how your print looks and lasts. If you align the paper grain with the print direction, your prints will be smoother, with less cracking or curling over time. Paper flexibility also matters—more flexible paper can handle bending without damage, ensuring your 13×19 prints stay crisp and durable. Always check the grain direction before printing for the best results.
Are There Eco-Friendly Paper Options Suitable for 13X19 Wide-Format Printing?
You’ll be amazed at how eco-friendly papers transform your prints! Recyclable materials and natural fibers create stunning, sustainable options perfect for 13×19 wide-format printing. These papers reduce environmental impact without sacrificing quality, making your prints not just beautiful but responsible. From bamboo to recycled stock, you can choose eco-conscious choices that support sustainability and leave a smaller footprint—proving that great art can go green!
Conclusion
Choosing the right paper and settings is key to making your 13×19 prints pop like a vivid sunset. When you understand how paper types and finishes affect color and sharpness, you’ll avoid dull or off-looking results. Think of your printer as a skilled artist’s brush—careful adjustments and proper paper handling can turn your wide-format prints into stunning masterpieces, just waiting to impress. Keep experimenting and fine-tuning, and your prints will always look their best.