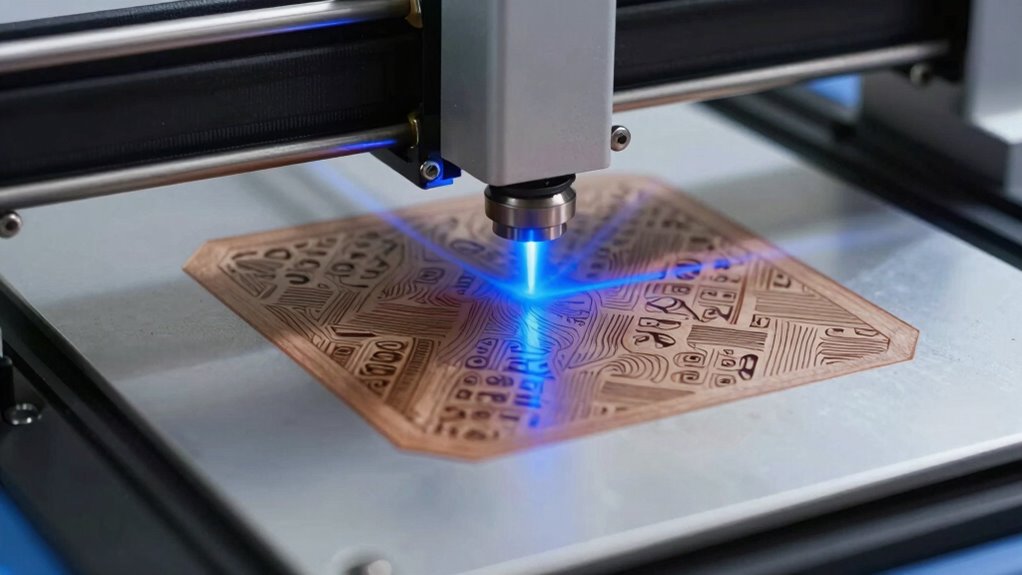
To get great results with your laser engraver, understanding how power and speed influence your work is crucial. Higher power makes engravings darker and deeper, but too much can cause burning or damage. Moving the laser slowly creates darker marks, while faster speeds produce lighter results. Material type also matters—softer materials need less power, while harder surfaces require more. Mastering these settings helps you sharpen your skills and produce more professional engravings—exploring further will reveal more tips and tricks.
Key Takeaways
- Laser power controls engraving darkness and depth; higher power creates darker, deeper marks, while lower power yields lighter results.
- Speed affects engraving quality; moving too fast causes faint marks, too slow risks burning or over-engraving.
- Material type and surface texture influence laser absorption, requiring tailored power and speed settings for optimal results.
- Testing small areas on new materials helps determine appropriate laser parameters and ensures safety and quality.
- Regular maintenance and proper calibration of laser focus, lenses, and mirrors improve engraving precision across various materials.

AC Motor Speed Controller 120V 15A – Variable Speed Regulator for Brushed Motors with Resettable Overload Protection and LED Display, Ideal for Router, Drill, Fan, Polisher and Woodworking Projects
- Power Compatibility: 110-120V, 8A rated, 15A peak
- Resistive Load Capacity: Up to 1800W resistive loads
- Inductive Load Capacity: Up to 1500W for brushed motors
As an affiliate, we earn on qualifying purchases.
As an affiliate, we earn on qualifying purchases.
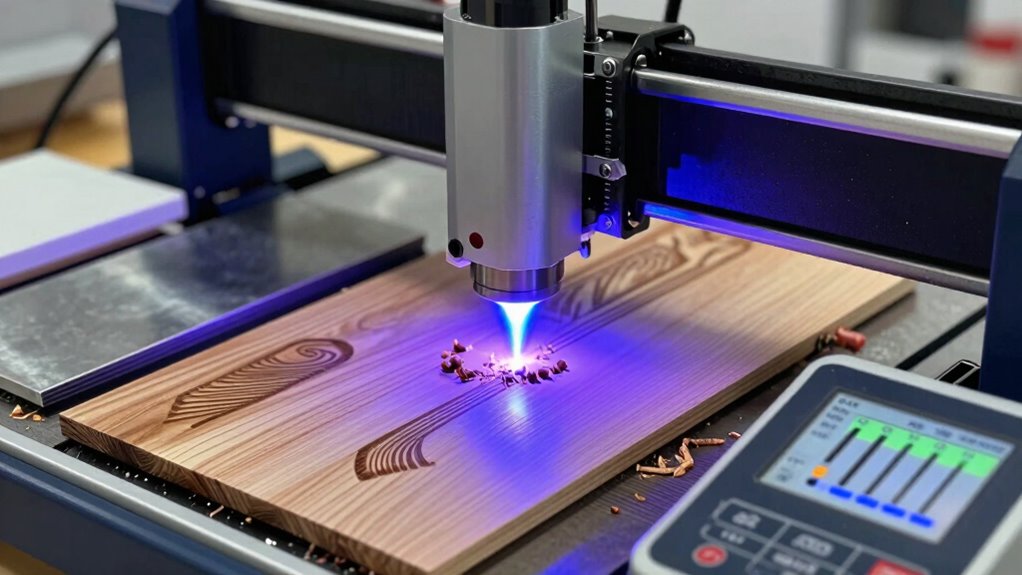
Laser Engraving Basics: How Power and Speed Affect Your Results

Understanding how power and speed influence your laser engravings is essential for achieving the desired results. The laser beam’s power determines how deeply and darkly your material is engraved, directly impacting engraving precision. Higher power settings produce more intense, darker marks, but too much can burn or distort the surface. Conversely, lower power offers lighter, more delicate engravings ideal for fine details. Speed also plays a critical role; moving the laser too fast may result in faint or incomplete engravings, while moving too slow can cause over-engraving or scorching. Finding the right balance between power and speed ensures clean, precise lines and consistent results. Adjusting laser parameters is crucial for tailoring your engraving process to specific materials and desired outcomes. Additionally, understanding the material properties helps in selecting the optimal power and speed settings for different substrates, ensuring professional-quality engravings. Being aware of material characteristics such as hardness and reflectivity can further improve your engraving results and prevent damage to your equipment. Proper calibration and machine settings are also vital for consistent quality across different projects.
Choosing the Right Materials for Laser Engraving Success
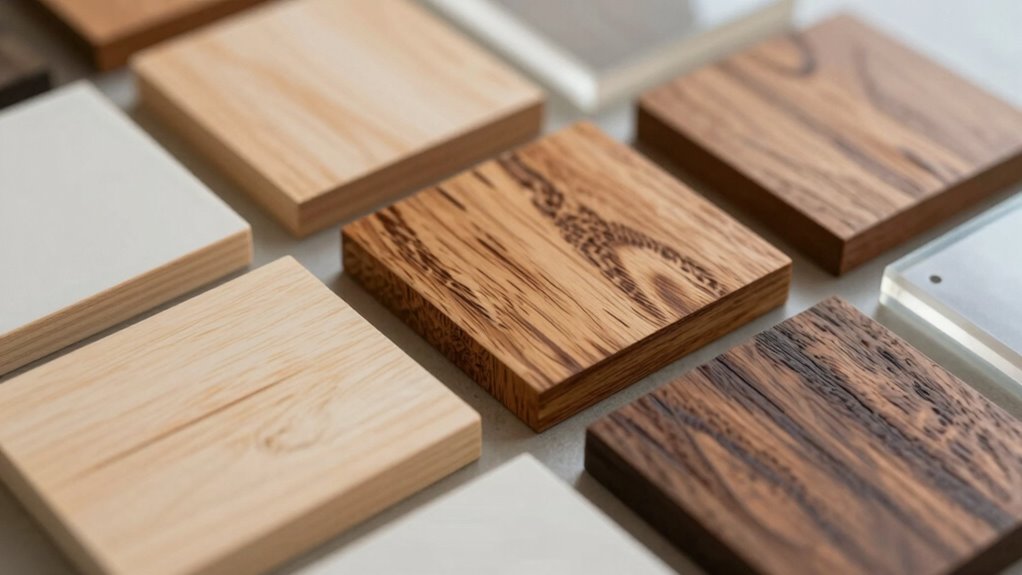
Choosing the right materials is key to getting the best results from your laser engraver. You need to contemplate material compatibility, surface texture, and how deep you want the engraving to go. Understanding these points helps you select materials that will work well and produce professional-looking designs. Additionally, considering the material properties ensures that the chosen material can withstand the laser process without warping or discoloration. Being aware of laser compatibility for different materials can prevent damage and improve engraving quality.
Material Compatibility Guidelines
Selecting the right materials is essential for achieving clean, precise engravings with your laser engraver. Material compatibility varies, so always check if your device can handle specific surfaces like wood, acrylic, or leather. Some materials release harmful fumes or pose safety risks, making safety considerations critical. For example, plastics like PVC emit toxic gases, so avoid engraving them. Test new materials on a small area before full projects to ensure compatibility and safety. Use manufacturer guidelines to confirm if a material is suitable for laser engraving. Properly chosen materials not only produce better results but also protect you and your equipment from hazards. Staying informed about material compatibility helps you create quality engravings while maintaining a safe workspace.
Surface Texture Impact
The surface texture of your material plays a significant role in the quality of your laser engraving. A smooth surface finish typically results in cleaner, more precise engravings, while textured or uneven surfaces can cause inconsistent shading and less sharp details. Texture variation influences how the laser interacts with the material; a rough or grainy surface may diffuse the laser beam, reducing contrast and clarity. Choosing materials with a consistent and even surface finish guarantees your engravings are clear and professional-looking. If you’re working with materials that have natural texture variation, consider how it might affect the final result. Being aware of surface texture impact can help you select the right materials and optimize your engraving process for top-quality outcomes. Additionally, understanding material surface properties can further enhance your ability to predict engraving results and troubleshoot issues effectively. Recognizing how surface texture influences laser absorption can also improve your overall engraving accuracy and detail. Moreover, mastering surface preparation techniques can significantly improve the final quality of your engravings.
Engraving Depth Considerations
To achieve the desired engraving results, you need to contemplate the appropriate depth for your design, which depends heavily on the material you use. The engraving depth determines how deeply your laser penetrates the material, affecting the visual impact and durability. Different materials allow for varying levels of material penetration; softer woods or plastics may require less power for a deeper engraving, while harder surfaces need higher settings to achieve the same effect. Be cautious not to over-penetrate, as excessive material removal can weaken the structure and cause burns or surface charring. Adjust your laser power and speed accordingly to control the engraving depth, ensuring a clean, precise result without damaging the material. Properly managing material penetration is key to successful, consistent laser engravings. Additionally, understanding the materials used in laser engraving helps optimize your settings for each project.
How to Adjust Your Laser Settings for Different Materials
To get the best results, you need to adjust your laser settings based on the material thickness. Start by making small changes and testing on scrap pieces to see how the engrave or cut turns out. Fine-tuning your settings guarantees precise and clean results every time. Additionally, always consider material safety to prevent hazards during the engraving process.
Material Thickness Adjustments
Have you ever struggled to cut or engrave thicker or thinner materials with your laser engraver? Adjusting for material thickness is key to achieving the right engraving depth and clean cuts. Thicker materials require lower power settings and slower speeds to make sure the laser penetrates fully without burning through. Conversely, thinner materials need higher speeds and reduced power to prevent over-engraving or burning through. Always measure your material’s thickness accurately, as even slight variations can affect your results. When setting up, start with manufacturer recommendations, then test and fine-tune based on your specific material. Proper adjustments help you control engraving depth, ensuring consistent, professional-looking results across different material thicknesses.
Test and Fine-Tune Settings
Before you start engraving or cutting, it’s essential to test and fine-tune your laser settings for each material. This ensures ideal results and prevents damage. Use test patterns to experiment with different power, speed, and focus adjustments. Calibration techniques, like marking a test area or using a calibration grid, help you identify the best settings. Keep a record of successful configurations for future use. Adjust your laser based on the material’s response, paying attention to burn marks or incomplete cuts. Regularly refine your settings by repeating test patterns until you achieve consistent quality. Proper testing minimizes waste and saves time during actual projects. Remember, each material reacts differently, so ongoing fine-tuning is key to mastering your laser engraver. Additionally, understanding the measurement tools used to evaluate engraving quality can further improve your results.
Troubleshooting Common Laser Engraving Problems
When laser engravings don’t turn out as expected, identifying the root cause quickly can save you time and materials. First, check your laser focus; if it’s off, the engraving can appear blurry or uneven. Adjust the focus to guarantee the laser beam hits the material precisely at the best point. Next, examine beam alignment—misaligned beams can cause uneven cuts or burns. Make sure the laser path is correctly aligned with your machine’s optics. Also, verify that your lens and mirrors are clean, as dirt or smudges can weaken the laser’s effectiveness. If problems persist, revisit your settings and test on scrap material. Addressing laser focus issues and beam alignment early helps improve engraving quality and prevents further frustration. Additionally, understanding the materials used in laser engraving can help optimize your settings for different surfaces and achieve better results. Regular maintenance and understanding the laser power and speed are crucial for consistent and high-quality engravings. To further enhance your results, familiarize yourself with laser safety precautions to prevent accidents and protect your equipment.
Tips to Fine-Tune Your Laser Settings for Professional Results
Fine-tuning your laser settings is key to achieving professional-quality engravings. Proper adjustments ensure clean, precise results while maintaining laser safety. Start by calibrating power and speed—lower power for delicate materials, higher for thicker ones. Regular maintenance tips, such as cleaning lenses and mirrors, keep your laser performing at its best. Keep a detailed log of your settings for different materials to streamline future projects. Always double-check safety features before adjusting settings to prevent accidents. Experiment with test runs on scrap material to refine your parameters. Remember, consistent maintenance and cautious adjustments improve engraving quality and extend your machine’s lifespan. By carefully fine-tuning your settings, you’ll produce professional results every time without compromising safety or efficiency.
Quick Guide: Setting Up Your Laser Engraver for Perfect Projects
Getting your laser engraver set up correctly is essential for achieving perfect projects right from the start. Begin by ensuring your workspace follows laser safety protocols—wear protective eyewear and keep the area clear of flammable materials. Next, calibrate your machine according to manufacturer instructions, adjusting power and speed settings for your chosen material. Establish a maintenance schedule to keep your engraver running smoothly—regularly clean lenses, mirrors, and vents to prevent dust buildup. Proper setup also involves securing your workpiece firmly and verifying alignment before starting. Additionally, understanding the best gear and knife roundups can help you select the right tools for maintenance and upgrades. Regularly inspecting and upgrading components like the laser power source can significantly improve your engraving results. Ensuring your laser safety measures are up to date not only protects you but also optimizes your machine’s performance. Implementing proper calibration techniques will help you achieve more precise and consistent results. By prioritizing laser safety and consistent maintenance, you reduce errors and extend your equipment’s lifespan. With these steps, you’ll create precise, professional results every time, making your laser engraving experience safer and more efficient.
Frequently Asked Questions
How Does Laser Wavelength Impact Engraving Quality?
Your laser wavelength directly impacts engraving quality because it affects material absorption and wavelength precision. A wavelength that matches the material’s absorption properties guarantees efficient energy transfer, resulting in cleaner, more detailed engravings. Precise wavelengths allow you to target specific materials accurately, reducing burn marks or uneven surfaces. Choosing the right wavelength optimizes your laser’s performance, giving you high-quality, consistent results every time you engrave.
Can Laser Engraving Damage Delicate or Soft Materials?
Imagine delicate glass shattering with a tiny whisper—that’s how laser damage can affect soft materials. Yes, laser engraving can harm delicate or soft materials if you’re not careful, especially due to material sensitivity. You must adjust power and speed settings carefully to prevent burns or warping. Always test on a small area first, as even gentle passes can cause irreversible damage on fragile surfaces.
What Safety Precautions Should I Follow During Laser Engraving?
You should always wear safety gear like goggles to protect your eyes and gloves for skin safety during laser engraving. Make certain your ventilation systems are working properly to remove fumes and dust. Keep the workspace clear of flammable materials, and never leave the laser unattended while in use. Following these precautions helps ensure your safety and prevents accidents or damage to your equipment.
How Does Ambient Temperature Affect Laser Engraving Results?
Think of ambient temperature like the weather outside—when temperature fluctuations occur, they can disrupt material stability, affecting your engraving results. Cooler or warmer temperatures cause materials to expand or contract slightly, leading to uneven engraving or inconsistent depth. To maintain precision, keep your workspace at a stable temperature, ideally around room temperature, ensuring your laser engraver performs excellently and your designs come out flawless every time.
Are There Environmental Considerations When Using Certain Materials?
When using certain materials, you should consider environmental factors like ventilation and humidity, as they impact safety and results. Choose eco-friendly materials whenever possible to reduce hazardous emissions and minimize environmental harm. Make certain your workspace is well-ventilated, especially when engraving plastics or other potentially hazardous materials, to protect yourself from harmful fumes and guarantee ideal engraving quality.
Conclusion
Mastering laser engraving is like wielding a modern Excalibur—your settings are the sword, and your materials, the quest. By understanding power, speed, and material choices, you’ll carve out professional results every time. Remember, even Merlin needed practice to perfect his magic. So, experiment boldly, troubleshoot patiently, and soon you’ll craft masterpieces that could turn King Arthur’s court green with envy. Keep honing your skills, and let your creativity shine brighter than a laser’s beam.