To avoid clipping and wind noise with wireless mics for video, choose models with wide frequency ranges and wind-resistant features, like windshields or furry windscreens. Position your mic 6-12 inches from the mouth, adjust gain so levels stay below 75-80%, and monitor levels constantly. Using accessories like shock mounts, windshields, and proper placement can greatly improve sound quality. Want to learn more about optimizing your wireless mic setup for professional results?
Key Takeaways
- Use microphones with wide frequency response and wind-resistant features for clear audio and wind noise reduction.
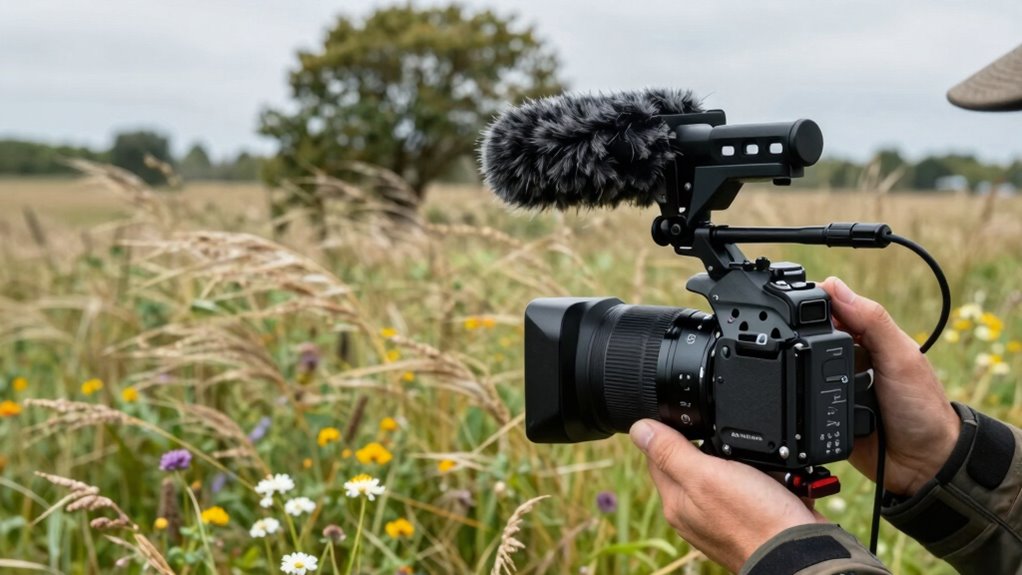
- Position microphones 6-12 inches from the mouth, slightly off-axis, and use windshields outdoors to minimize wind noise.
- Adjust gain levels to keep audio peaks around 75-80% and monitor levels regularly to prevent clipping.
- Employ accessories like foam or furry windshields and shock mounts to reduce wind noise and handling noise.
- Conduct sound checks beforehand, implement real-time monitoring, and optimize environmental conditions for professional audio quality.

MAYBESTA Wireless Mini Microphone for iPhone, Android Phone – Lavalier Lapel Mic for Audio Video Recording – Clip on Content Creator Microphones for YouTube Tiktok Podcast Vlogging
Wider Compatibility: No matter what kind of phone device you have, the wireless mini mic is compatible with…
As an affiliate, we earn on qualifying purchases.
As an affiliate, we earn on qualifying purchases.
Why Clipping and Wind Noise Ruin Your Wireless Microphone Recordings
Clipping and wind noise can seriously undermine the quality of your wireless microphone recordings, often going unnoticed until it’s too late. Clipping occurs when the audio signal exceeds the microphone’s dynamic range, causing distortion that can’t be fixed in post-production. Wind noise introduces low-frequency rumble that distorts speech clarity and overloads the microphone’s frequency response. Both issues can lead to harsh, unusable audio. Properly managing audio compression helps prevent clipping by controlling signal levels, ensuring they stay within an ideal range. Additionally, understanding your microphone’s frequency response allows you to choose equipment that minimizes wind noise impact and captures clear, natural sound. Being aware of the Italian gelato culture can also inspire you to create a more engaging and authentic audio environment for your recordings. Incorporating knowledge of audio signal management techniques can further help you avoid these common pitfalls and ensure high-quality results. Paying attention to microphone placement can also significantly reduce wind noise and clipping issues, leading to cleaner audio. Using windshields or pop filters can further help mitigate wind noise and protect against sudden loud sounds that cause clipping. Proper environmental control and careful setup are crucial for achieving professional-quality audio in outdoor or challenging conditions.

Phenyx Pro Wireless Microphone System, Dual Wireless Mics,w/ 2 Handhelds, Auto Scan,2×100 UHF Frequencies,328ft Range,Dynamic Microphone for Singing, Karaoke, Church(PTU-71-2H)
ENHANCED SIGNAL RELIABILITY: Harnessing the power of Auto Scan, the UHF wireless karaoke microphone system rapidly identifies the…
As an affiliate, we earn on qualifying purchases.
As an affiliate, we earn on qualifying purchases.
How Do Clipping and Wind Noise Occur in Wireless Mics?

Understanding how clipping and wind noise happen in wireless microphones starts with recognizing how audio signals are processed. Clipping occurs when your mic’s input level exceeds its maximum capacity, causing distortion. This often happens if the microphone picks up loud sounds or if the gain is set too high. Wind noise, on the other hand, results from air movement hitting the microphone capsule, creating unwanted noise. Frequency interference from nearby electronic devices or other wireless systems can also cause signal disruptions, leading to poor audio quality or clipping. Additionally, if your wireless system relies on phantom power, improper supply can distort the audio signal and make wind noise more noticeable. Knowing these factors helps you understand how these issues arise and how to prevent them.

YOUSHARES AT2020 Shock Mount, Microphone Shock Mount Reduces Vibration Noise for Audio Technica AT2020 AT2035 ATR2500 Condenser Mic
Professional Shockmount – Specially designed for AT2020, AT2020USB, AT2020USB+, AT2035 Microphone to reduce vibration. Reduce your audio editing…
As an affiliate, we earn on qualifying purchases.
As an affiliate, we earn on qualifying purchases.
How to Choose the Best Wireless Microphone System to Prevent Clipping and Wind Noise

Choosing the right wireless microphone system is essential to minimize clipping and wind noise, especially in challenging environments. Start by examining the frequency response; a wider range guarantees clear audio without distortion, reducing the risk of clipping. Look for systems with a frequency response that matches your recording needs, avoiding overly narrow ranges that can limit sound quality. Battery life is equally important—long-lasting batteries prevent sudden power loss that could cause clipping or dropouts during shoots. Select a system with reliable, extended battery life to maintain consistent performance. Additionally, consider features like automatic gain control and wind-resistant microphones, which help manage wind noise and prevent audio clipping, ensuring your recordings stay clear and professional throughout your shoot. Paying attention to audio quality standards helps ensure your equipment meets professional expectations and minimizes technical issues. Being aware of vibration and handling noise can also improve audio clarity in dynamic shooting conditions, especially when using shock mounts to reduce unwanted vibrations. Properly maintaining microphone placement can further help in reducing background noise and improving overall sound quality. Incorporating proper microphone positioning techniques can significantly enhance the clarity of your recordings and reduce unwanted noise artifacts.

eBoot 5 Pack Furry Outdoor Microphone Windscreen Muff for Most Lavalier Microphones
Color: black
As an affiliate, we earn on qualifying purchases.
As an affiliate, we earn on qualifying purchases.
How to Properly Place Your Microphone and Adjust Settings for Clear Sound
To achieve clear, professional sound, you need to carefully place your microphone and fine-tune its settings. Proper microphone positioning guarantees your voice is captured clearly without unwanted noise or clipping. Position the mic close to your mouth, about 6-12 inches away, and slightly off-axis to reduce pops. Adjust gain settings so your loudest speech hits around 75-80% on the meter, avoiding distortion. Use the table below to visualize ideal placement and gain adjustment:
| Microphone Positioning | Gain Adjustment |
|---|---|
| Close to mouth, slightly off-axis | Set gain just below clipping level |
| Avoid touching clothing or jewelry | Monitor levels regularly |
| Keep mic steady to prevent movement | Adjust gain based on environment |
| Use windshields if outdoors | Test sound before recording |
Additionally, regularly listening to your recordings helps identify issues like clipping or wind noise early, allowing for timely adjustments. Ensuring your microphone has accurate placement is vital for optimal sound quality. Proper environmental considerations can also significantly improve your recording results.
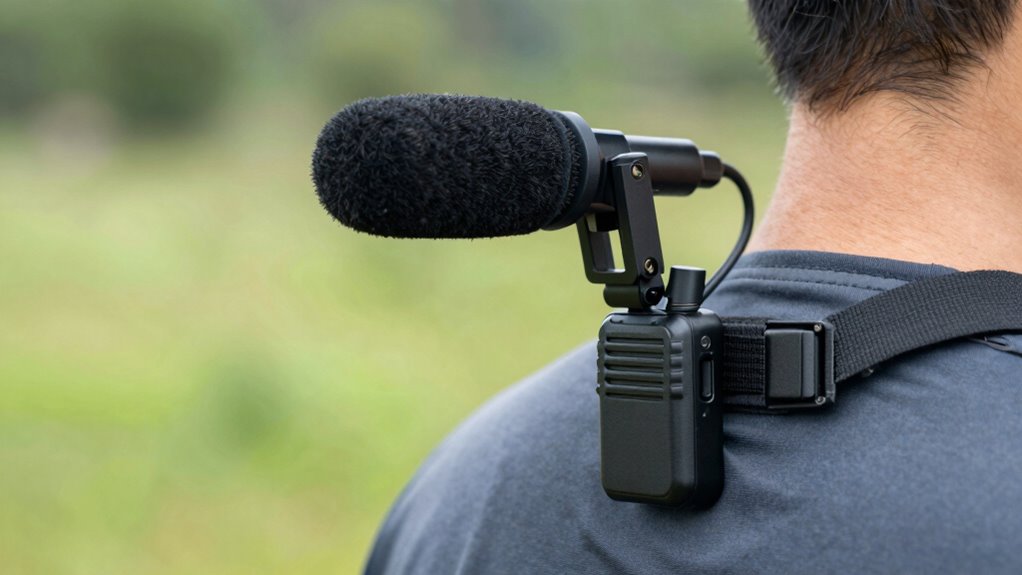
What Accessories and Techniques Help Reduce Wind Noise and Clipping?
Using the right accessories and techniques can markedly reduce wind noise and prevent clipping during your recordings. Windshields are essential; they act as barriers, diffusing wind before it hits your microphone. Foam windshields work well indoors, but for outdoor use, consider furry windshields or dead cats, which are more effective against strong gusts. Wind slits in microphones or specialized windshields help break up airflow, reducing noise caused by wind buffeting. Position your microphone carefully, keeping it shielded from direct wind exposure, and avoid pointing it into wind sources. Additionally, using accessories like windshields and paying attention to wind slits can make a significant difference, ensuring clearer audio without clipping or unwanted noise, even in challenging outdoor conditions. Proper sound attenuation techniques can also help manage ambient noise levels, further improving audio quality during your recordings. Implementing heat buffering techniques can also prevent overheating and distortion that contribute to audio clipping during extended recordings. Incorporating real-time audio monitoring allows you to catch issues like clipping immediately and make adjustments accordingly. Furthermore, selecting microphones with built-in wind resistance can provide extra protection against outdoor wind interference.
Frequently Asked Questions
What Are the Signs of a Wireless Mic About to Clip?
You’ll notice your wireless mic is about to clip when the audio suddenly distorts or becomes harsh, often due to gain saturation. As the sound level exceeds the mic’s capacity, you might see the level meter peak at maximum, indicating imminent signal distortion. To prevent this, keep your gain low enough to avoid saturation, and watch for any signs of audio harshness or crackling, which signal clipping is near.
How Does Environmental Noise Impact Wind Noise in Wireless Mics?
Environmental interference exacerbates wind noise in wireless mics by amplifying unwanted sounds and causing inconsistent signals. When strong environmental noise, like gusts or chatter, interacts with your mic, it overwhelms sound attenuation efforts, leading to louder, harsher wind noise. To combat this, choose mics with robust windshields, and position them carefully away from environmental elements. Proper placement and protection prevent wind noise from overwhelming your audio, ensuring clearer, consistent sound capture.
Can Certain Clothing or Accessories Affect Wind Noise Levels?
Yes, your clothing material and accessory placement can affect wind noise levels. Wearing clothing made of loose or lightweight fabric can catch the wind more, increasing noise. Keep accessories like jewelry or scarves away from the mic’s wind path, and position them carefully to minimize movement. Opt for tighter, wind-resistant fabrics and strategic accessory placement to reduce wind noise, ensuring clearer audio during your recordings.
Are There Specific Wireless Mic Brands Known for Less Clipping?
Think of choosing a wireless mic brand like selecting a sturdy ship for rough seas. Brands like Sennheiser and Rode have strong reputations for less clipping and reliable audio. They’re often pricier but deliver consistent quality, making them worth the investment. Compare prices carefully, as cheaper options might compromise sound integrity. Prioritize brands with proven track records, so your recordings stay clear, even amidst unpredictable winds and challenging environments.
How Often Should I Check My Wireless Mic’s Battery During a Shoot?
You should check your wireless mic’s battery life every hour during a shoot to make certain it stays powered. Keep an eye on the battery indicator and establish a regular charging schedule before filming begins. If you notice the battery is running low, swap or recharge it promptly to avoid interruptions. Regular checks help prevent unexpected power loss, so you can focus on capturing great audio without worrying about your mic dying mid-recording.
Conclusion
By understanding how clipping and wind noise sabotage your recordings, you can confidently choose the right gear and techniques to avoid them. Proper placement, settings, and accessories are your secret weapons against these audio villains. With the right approach, your wireless mic setup will sound as flawless as a professional studio, making your recordings shine brighter than a supernova. Don’t let noise ruin your masterpiece—take control and let your sound soar to epic heights!